How Do I Optimize An Image With Smush

Beginners Guide: How Do I Optimize An Image With Smush
Image optimization is a crucial aspect of website design and performance. Optimized images load faster and have a positive impact on user experience, search engine rankings, and bandwidth costs. Smush is a popular image optimization plugin for WordPress that can help you achieve these benefits.
In this article, we’ll explore the benefits of using Smush for image optimization, provide a step-by-step guide for optimizing images with Smush, and discuss common issues and solutions with the plugin.

Benefits of using Smush for Image Optimization
1. Faster Page Load Time
Faster page load time is essential for a positive user experience and improved search engine rankings. Smush optimizes images by reducing their file size without sacrificing quality. This results in faster page load times, which can lead to improved user engagement and increased conversions.
2. Improved User Experience
A slow-loading website can be frustrating for users and lead to high bounce rates. Smush optimizes images to ensure that pages load quickly, providing a better user experience.
3. Higher Search Engine Rankings
Search engines prioritize websites with fast page load times. By optimizing images with Smush, you can improve your website’s search engine rankings and visibility.
4. Reduced Bandwidth Costs
Large, unoptimized images can consume a significant amount of bandwidth. Smush compresses images to reduce their file size, reducing bandwidth costs and improving website performance.
Step by Step Guide for Optimizing Images with Smush
1. Installing the Smush Plugin
To get started with Smush, you need to install the plugin on your WordPress website. Here’s how:
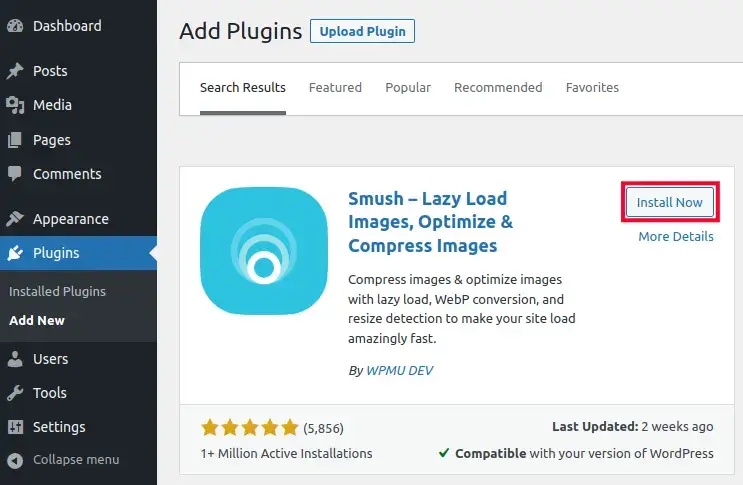
- Log in to your WordPress dashboard
- Go to the plugins section
- Click on “Add New”
- Search for “Smush”
- Click on “Install Now”
- Activate the plugin
2. Setting Up Smush
Once you have installed Smush, you need to set it up:
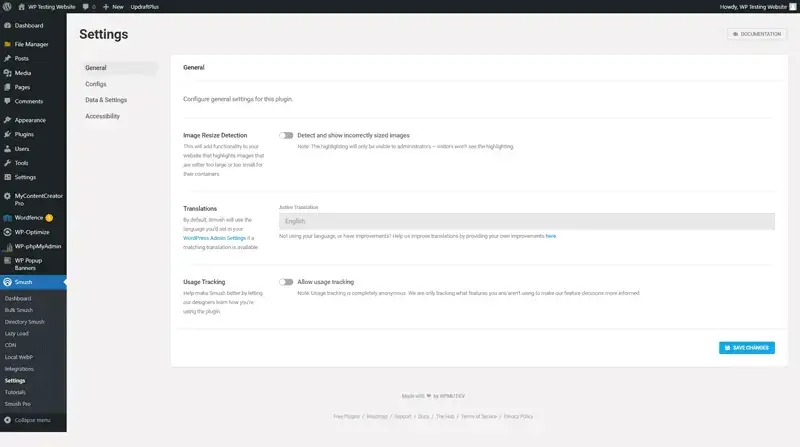
- Go to the Smush settings page in your WordPress dashboard
- Select the compression level you prefer (lossless or lossy)
- Enable the “Auto-Smush” option to automatically optimize new images as they are uploaded
- Click on “Save Changes”
3. Optimizing Single Images With Smush
To optimize a single image with Smush, follow these steps:
- Go to the media library in your WordPress dashboard
- Select the image you want to optimize
- Click on “Smush”
- The plugin will optimize the image and show you the results
4. Bulk Optimizing Multiple Images
To optimize multiple images at once, follow these steps:
- Go to the Smush page in your WordPress dashboard
- Click on “Bulk Smush”
- Select the images you want to optimize
- Click on “Smush Selected”
- The plugin will optimize the selected images and show you the results
5. Compression Settings and Quality
Smush offers two compression levels: lossless and lossy. Lossless compression reduces the file size of images without sacrificing quality, while lossy compression reduces the file size by removing some image data.
If you want to maintain the highest quality images, select the lossless compression option. If you’re willing to sacrifice some quality for faster page load times, select the lossy compression option.
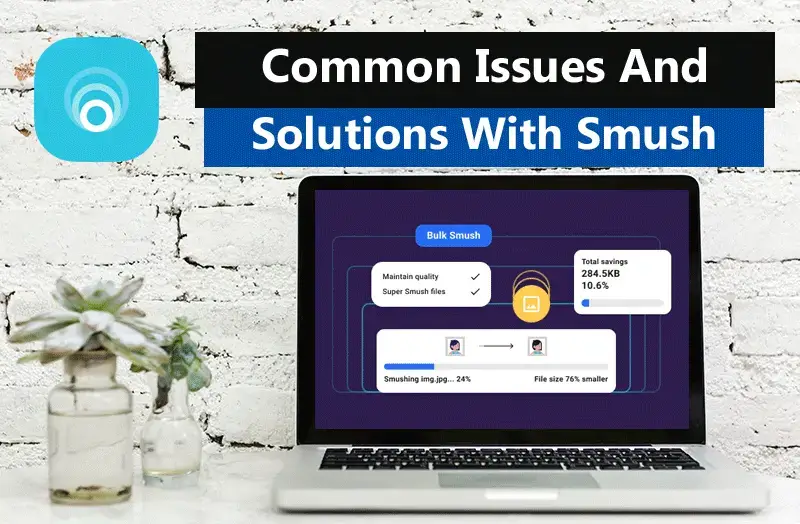
Common Issues and Solutions with Smush
1. Images Not Optimizing Properly
If you’re experiencing issues with images not optimizing properly, here are some solutions to try:
- Check your compression settings: Ensure that you have selected the correct compression level for your images.
- Verify image format: Make sure that the images you are trying to optimize are in a format that Smush can handle (JPEG, PNG, or GIF).
- Check file size: Smush has a file size limit of 5MB. If your images are larger than 5MB, they will not be optimized.
2. Images Losing Quality
If you notice that your images are losing quality after being optimized with Smush, try adjusting the compression level. If you’re using the lossy compression option, try switching to the lossless option to see if that improves the quality of your images.
3. Smush Not Working with Certain Themes or Plugins
If you’re experiencing issues with Smush not working with certain themes or plugins, try deactivating the theme or plugin to see if that resolves the issue. If that doesn’t work, reach out to the Smush support team for assistance.
Smush is a powerful image optimization plugin that can help improve the performance of your WordPress website. By reducing the file size of images, Smush can help improve page load times, user experience, search engine rankings, and reduce bandwidth costs.
In this article, we’ve provided a step-by-step guide for optimizing images with Smush and discussed common issues and solutions with the plugin. By following these tips and utilizing Smush, you can ensure that your website’s images are optimized for the best possible performance.
Here are some detailed bullet points that summarize the main points of the article:
- Definition of Image Optimization: The process of reducing the file size of images to improve website performance
- Importance of Image Optimization: Faster page load time, improved user experience, higher search engine rankings, and reduced bandwidth costs
- Brief Explanation of Smush: A popular image optimization plugin for WordPress
Benefits of using Smush for Image Optimization:
- Faster Page Load Time: Reducing image file size leads to faster page load times, improving user engagement and conversions
- Improved User Experience: Quicker page load times lead to a better user experience and reduced frustration
- Higher Search Engine Rankings: Search engines prioritize websites with fast page load times, leading to improved rankings and visibility
- Reduced Bandwidth Costs: Compressing images reduces their file size, reducing bandwidth costs and improving website performance
Step by Step Guide for Optimizing Images with Smush:
- Installing the Smush Plugin: Log in to your WordPress dashboard, go to the plugins section, search for “Smush”, click on “Install Now”, and activate the plugin
- Setting Up Smush: Go to the Smush settings page, select the compression level, enable “Auto-Smush”, and click on “Save Changes”
- Optimizing Single Images: Go to the media library, select the image, click on “Smush”, and the plugin will optimize the image
- Bulk Optimizing Multiple Images: Go to the Smush page, click on “Bulk Smush”, select images, click on “Smush Selected”, and the plugin will optimize the selected images
- Compression Settings and Quality: Smush offers two compression levels (lossless and lossy), with lossless maintaining the highest quality and lossy sacrificing some quality for faster page load times
Common Issues and Solutions with Smush:
- Images Not Optimizing Properly: Check compression settings, verify image format, and check file size (Smush has a file size limit of 5MB)
- Images Losing Quality: Adjust compression level, switch from lossy to lossless compression
- Smush Not Working with Certain Themes or Plugins: Deactivate the theme or plugin, reach out to Smush support team for assistance
Conclusion:
- Summary of Benefits: Smush improves page load times, user experience, search engine rankings, and reduces bandwidth costs
- Final Thoughts: Smush is a powerful image optimization plugin for WordPress, utilizing it can lead to improved website performance
- Recommendation: Try Smush for better website performance and optimized images.

Action Plan for Optimizing Images with Smush
1. Install Smush Plugin: Log in to your WordPress dashboard, go to the plugins section, search for “Smush”, click on “Install Now”, and activate the plugin.
2. Set Up Smush: Go to the Smush settings page, select the compression level (lossless or lossy), enable “Auto-Smush”, and click on “Save Changes”.
3. Optimize Single Images: Go to the media library, select the image, click on “Smush”, and the plugin will optimize the image.
4. Bulk Optimize Multiple Images: Go to the Smush page, click on “Bulk Smush”, select images, click on “Smush Selected”, and the plugin will optimize the selected images.
5. Monitor Image Quality: After optimizing images, monitor the quality to ensure that it meets your standards. If necessary, adjust the compression level or switch from lossy to lossless compression.
6. Address Common Issues: If you experience any issues with Smush, such as images not optimizing properly or Smush not working with certain themes or plugins, try deactivating the theme or plugin or reach out to Smush support for assistance.
7. Evaluate Results: Monitor your website’s performance, including page load times, user experience, and search engine rankings, to evaluate the results of your image optimization efforts.
By following this action plan, you can effectively optimize your images with Smush and improve the performance of your WordPress website.
Summary:
In this article, we’ve explored the benefits of using Smush for image optimization and provided a step-by-step guide for optimizing images with the plugin. Smush offers two compression levels (lossless and lossy) to reduce the file size of images and improve website performance.
The benefits of using Smush include faster page load times, improved user experience, higher search engine rankings, and reduced bandwidth costs.
Conclusion:
Image optimization is a crucial aspect of website design and performance, and Smush is a powerful tool to help achieve these goals. By following the steps outlined in this article, you can effectively optimize your images with Smush and improve the performance of your WordPress website.
Whether you’re looking to improve page load times, user experience, search engine rankings, or reduce bandwidth costs, Smush can help. So why wait? Give Smush a try today and see the results for yourself!